I installed the application and the server from here https://github.com/dineshshetty/Android-InsecureBankv2/releases/tag/2.3.1.
Let’s have a look on the app:
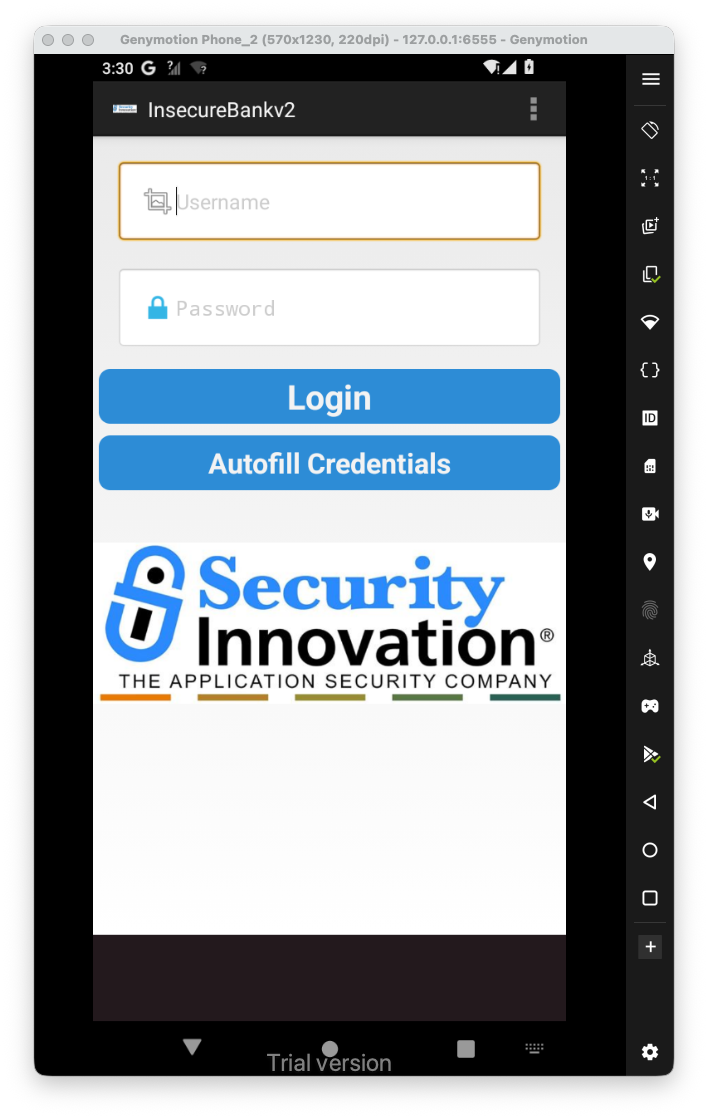 This is the main activity.
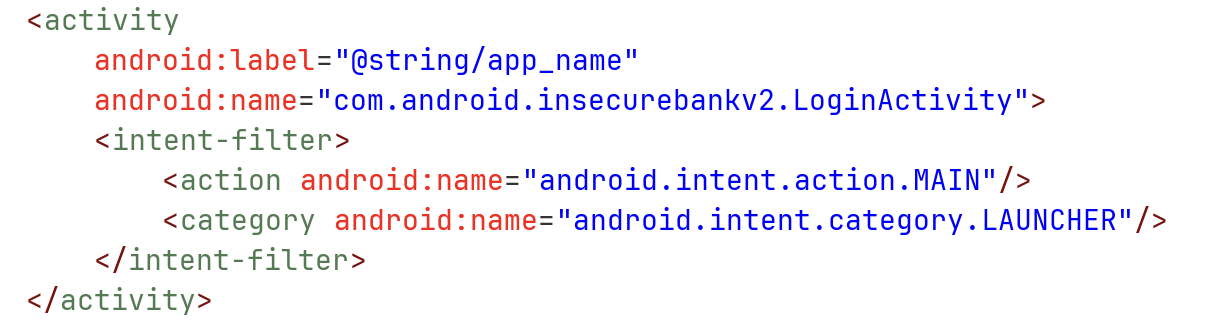
First, we can see it grabs some value from values/strings.xml, and checks if it’s equal to no:
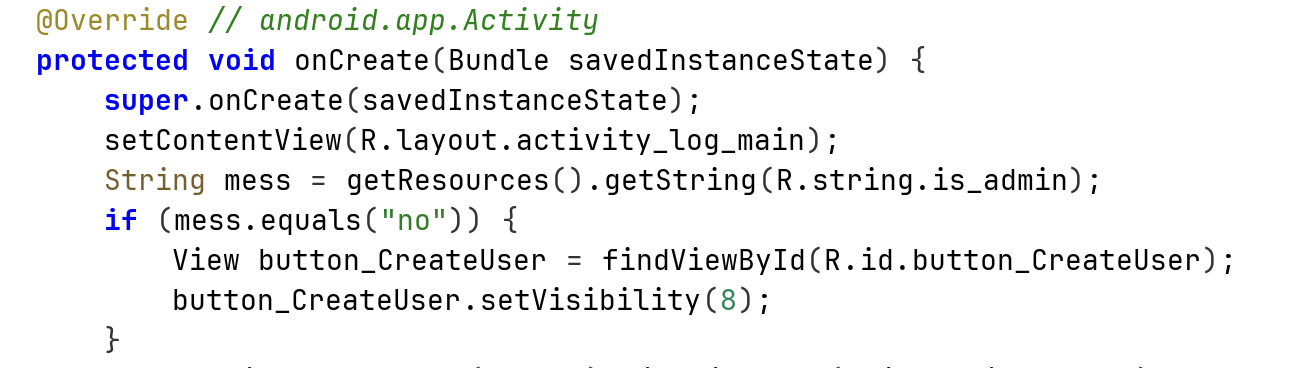

We can edit the file strings.xml, and then compile the apk again, sign it and use it.
Runtime Manipulation
Another way will be to simply hook it with frida:
Java.perform(function() {
    Java.use('java.lang.String').equals.implementation = function(str) {
        if(str == 'no'){
            console.log("Hook equals");
            return false;
        }
        return this.equals(str);
    }

})
frida -U -f com.android.insecurebankv2 -l ./frida-script.js
This button do nothing, and after some time, the application crashes.
Application Patching
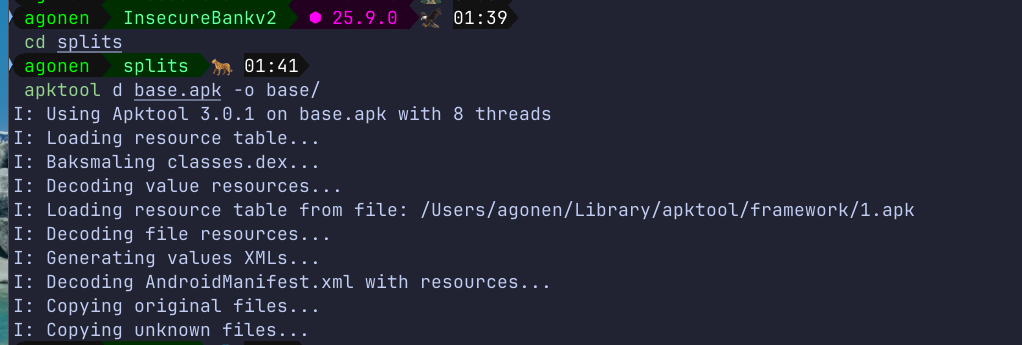
Let’s try to patch the application. For this, we’ll learn something that is more general. In case you have xapk file, after installation you have several apk files, you’ll want to download them all:
mkdir splits
# Pull all files from installation folder
adb shell pm path "com.android.insecurebankv2" | cut -d ":" -f 2 | xargs -I {} adb pull {} splits/

Now, we want to decompile the file base.apk, and then edit whatever we want in the smali code\ strings.xml in our case:
cd splits/
apktool d base.apk -o base/
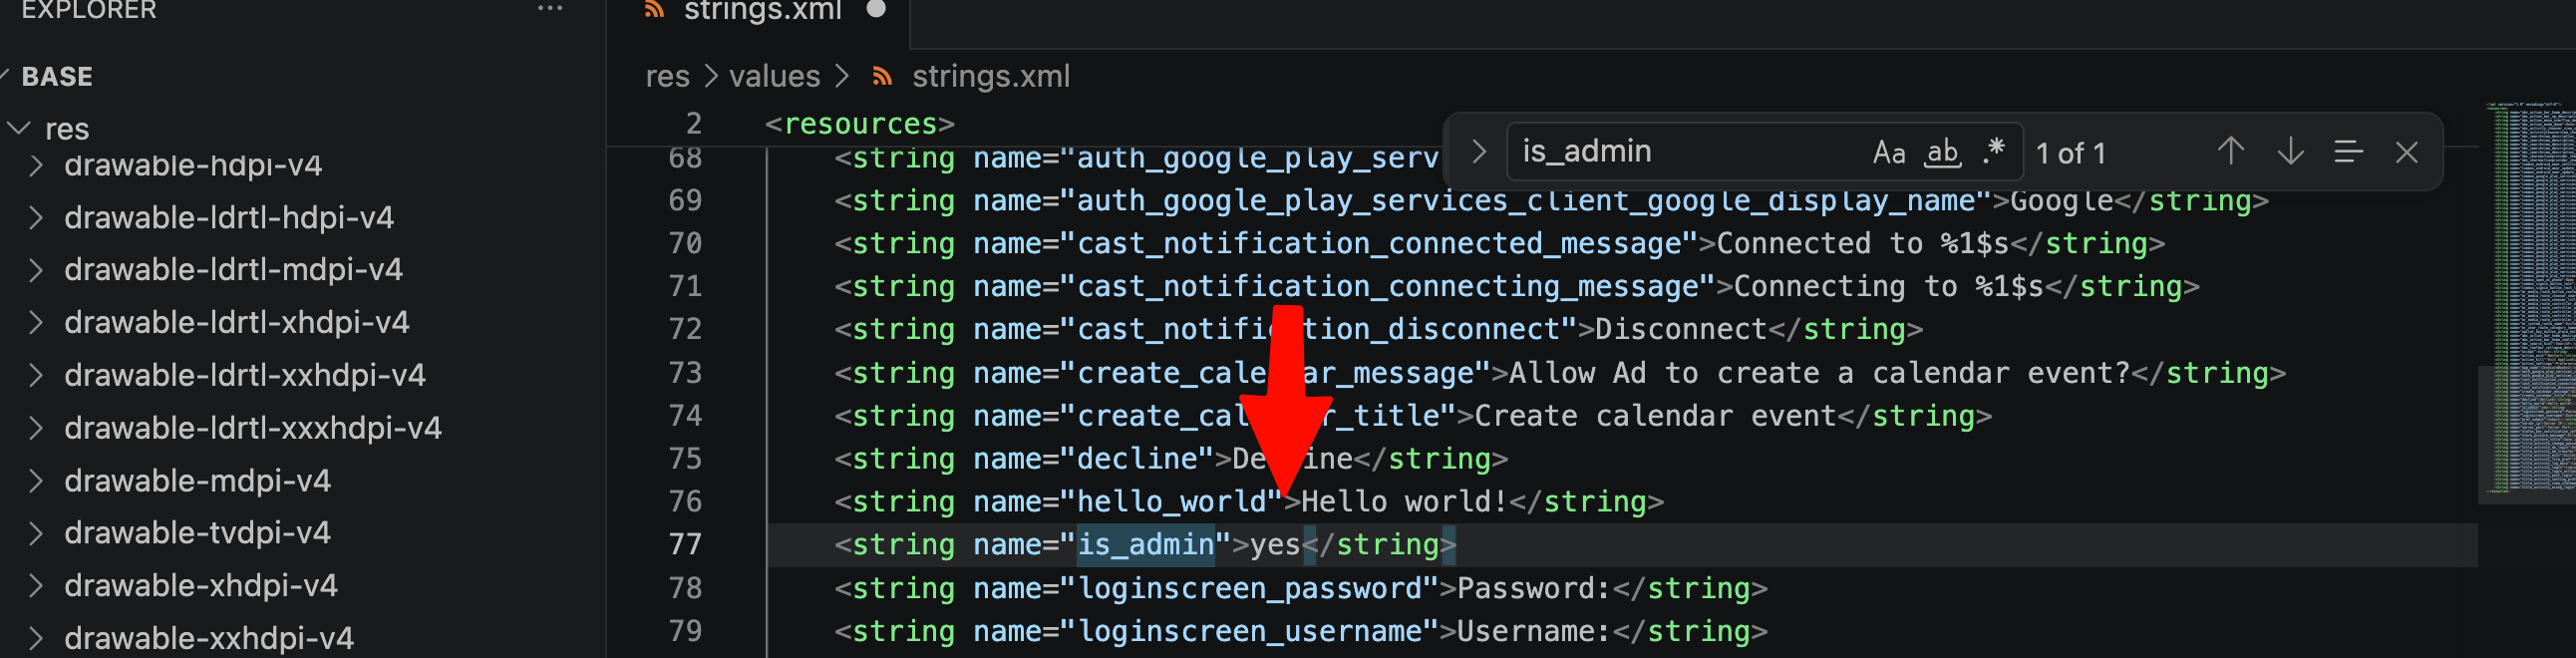
Now, we want to edit the files, in our case the file values/strings.xml:
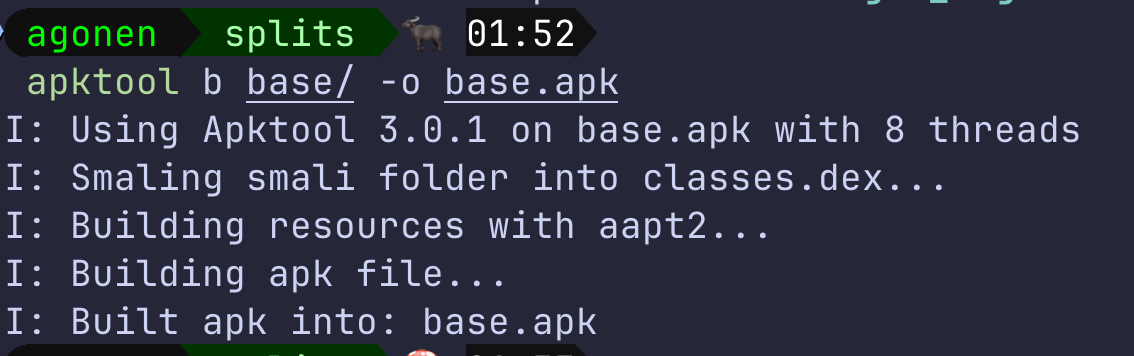
After editing, we need to compile it back to base.apk:
apktool b base/ -o base.apk
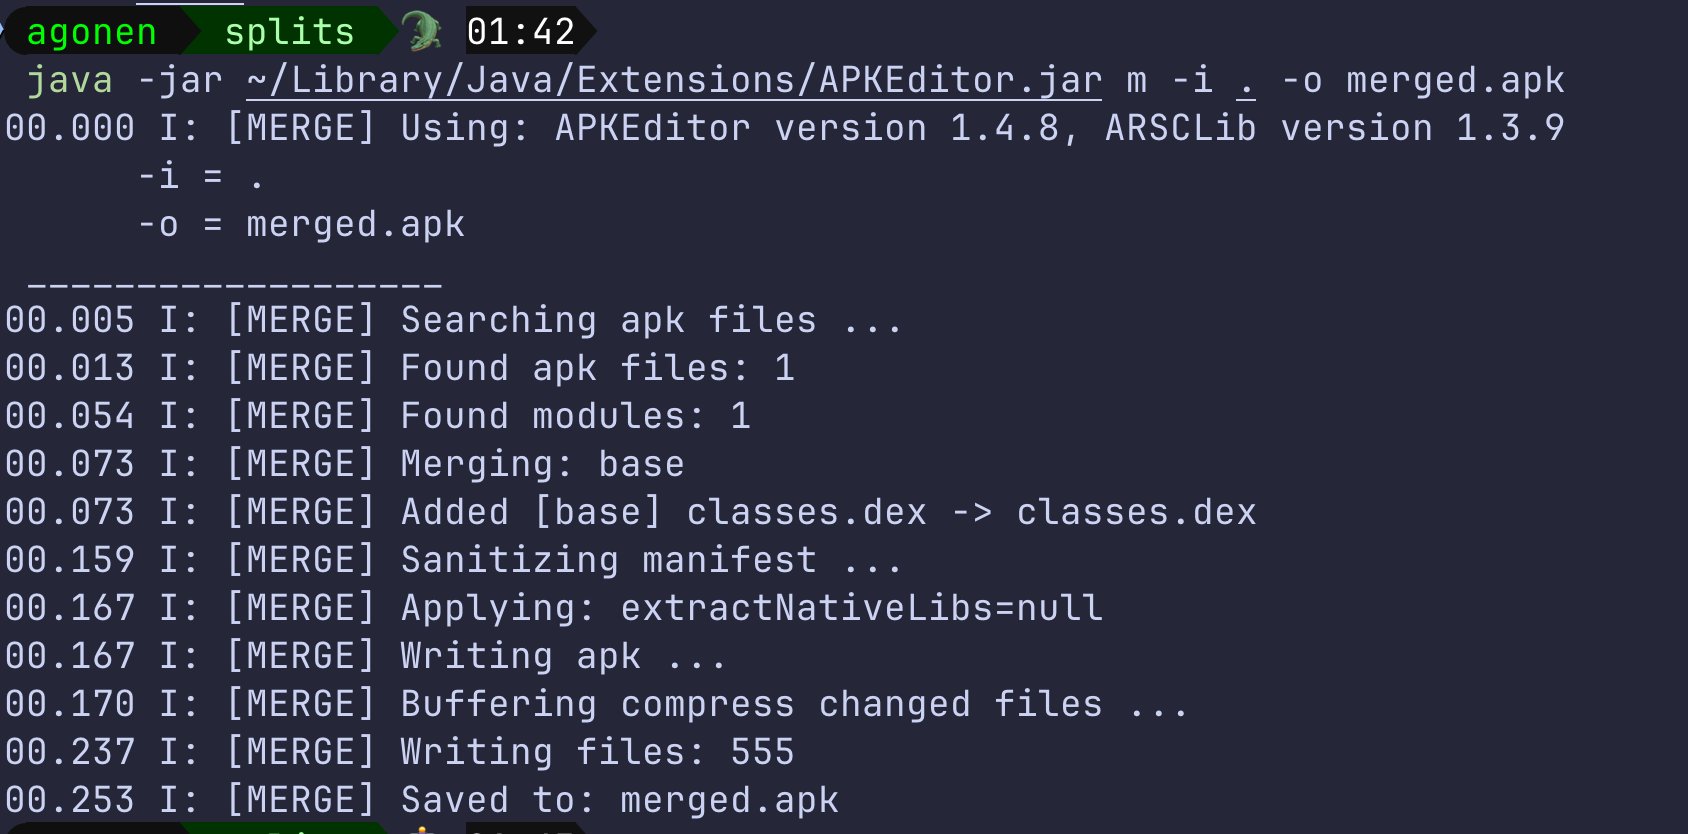
Then, we need to merge all the .apk files (in our case not really, because this isn’t xapk, rather regular apk file):
java -jar ~/Library/Java/Extensions/APKEditor.jar m -i . -o merged.apk
Now, let’s sign the merged apk file:
java -jar ~/Library/Java/Extensions/uber-apk-signer.jar -a merged.apk --allowResign -o merged_signed

And we are ready for the installation back on the machine, not before uninstalling the older version:

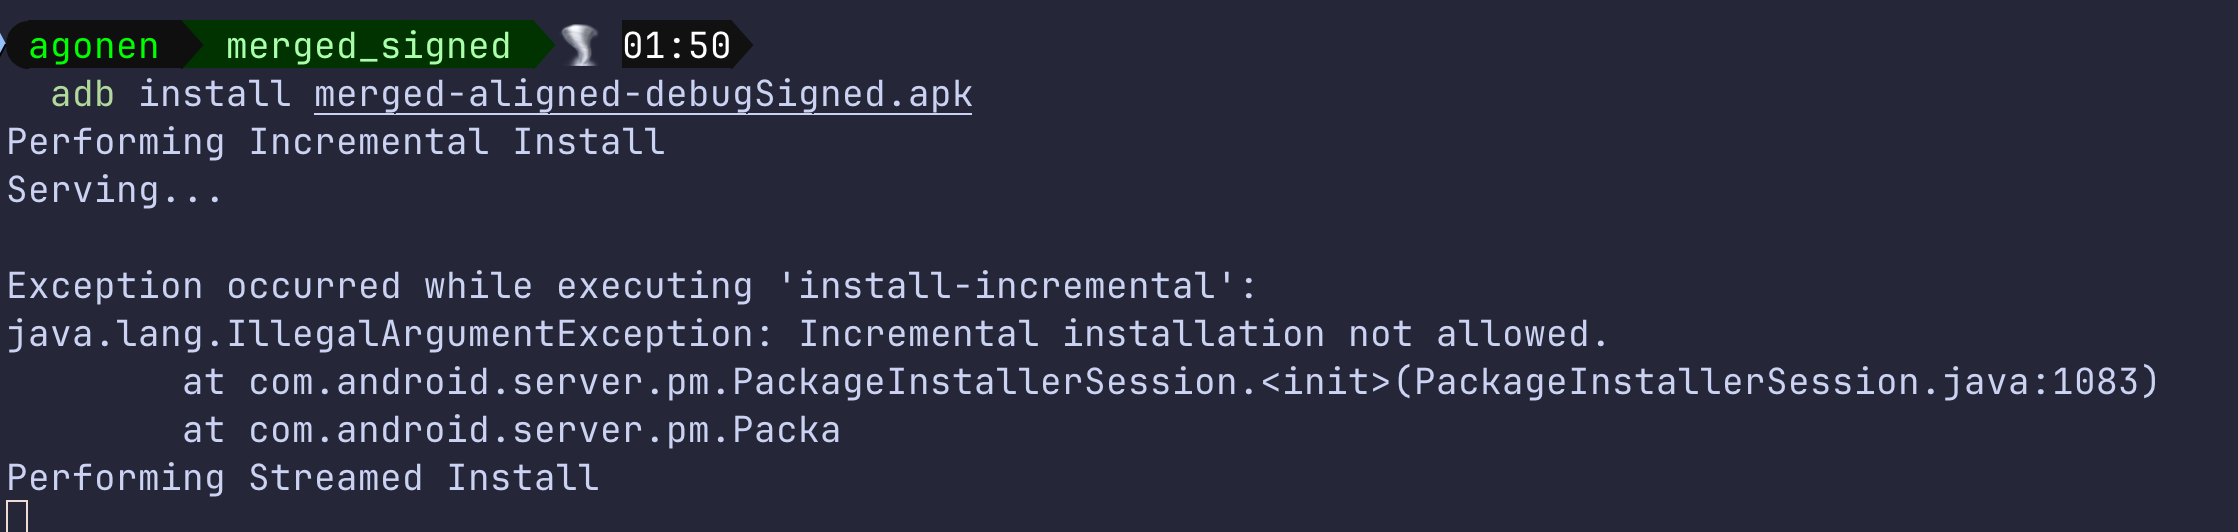
You’ll need to allow its installation on the device, notice that i needed to use the flag --bypass-low-target-sdk-block, because the sdk version wasn’t compatible with the device.
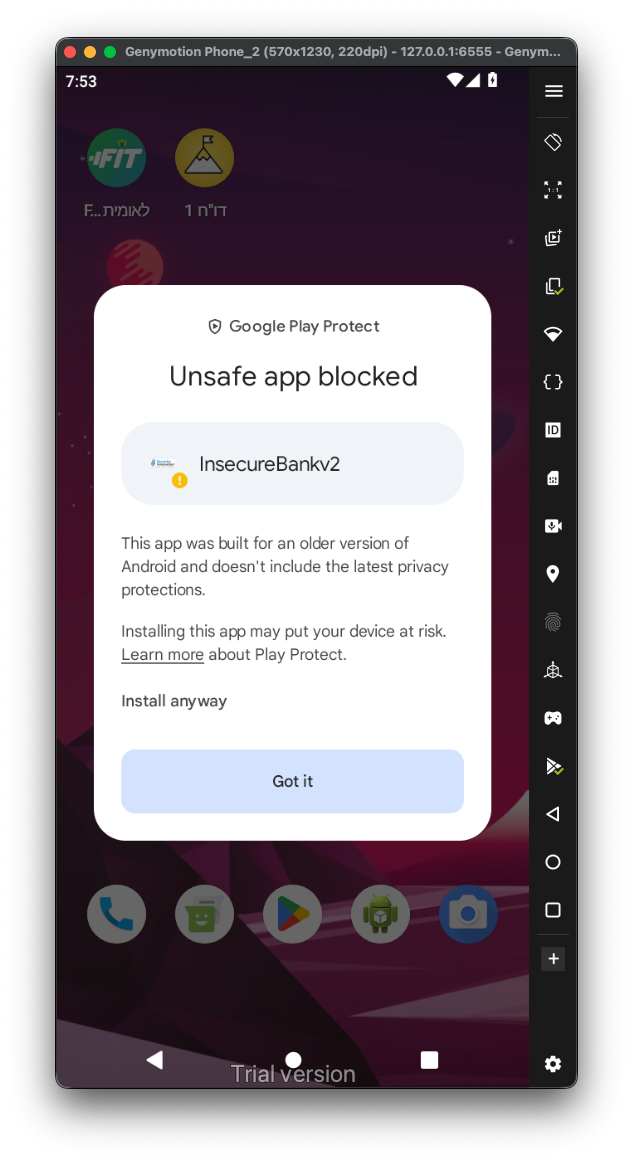
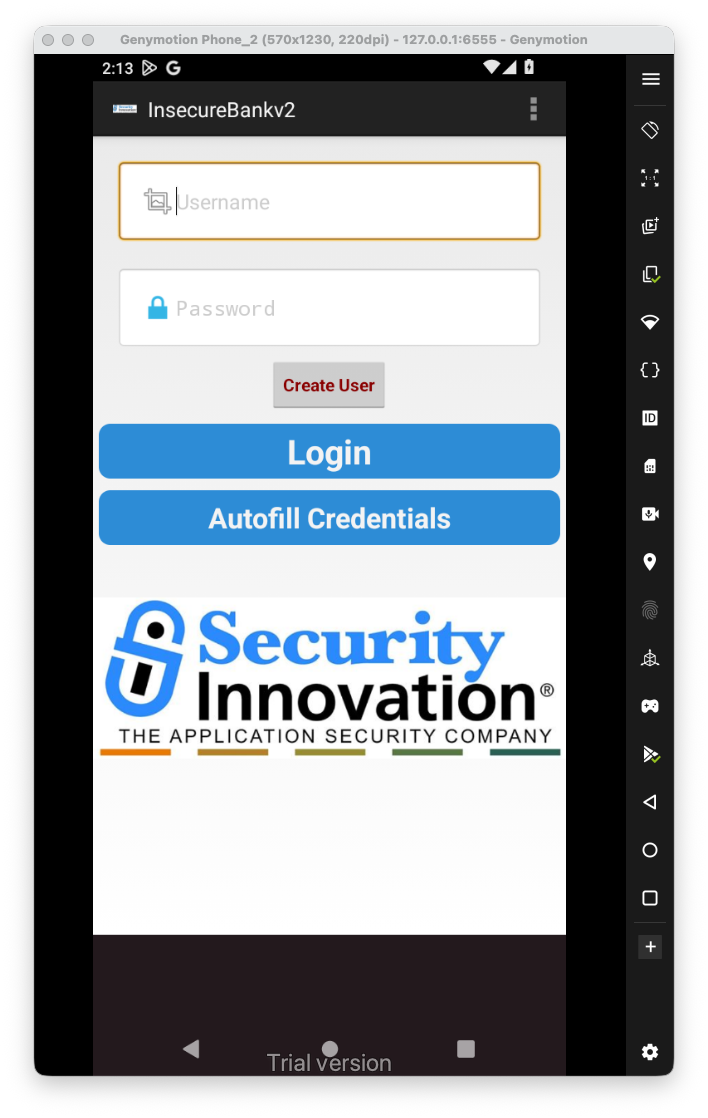
Now, when accessing the app:
 Perfect.
Now, I want to install the local server, and set it up.
The original version was for python2, i needed to edit it a bit in order it fill work in python3, I’m using python3.10.
First, download the zip from AndroLabServer, It hosted in my github too.
Then, create the virtual environment, and activate it:
python3.10 -m venv venv
source venv/bin/activate
We’ll need to install the packages, just execute the next line:
pip install -r requirements.txt
and we are ready:
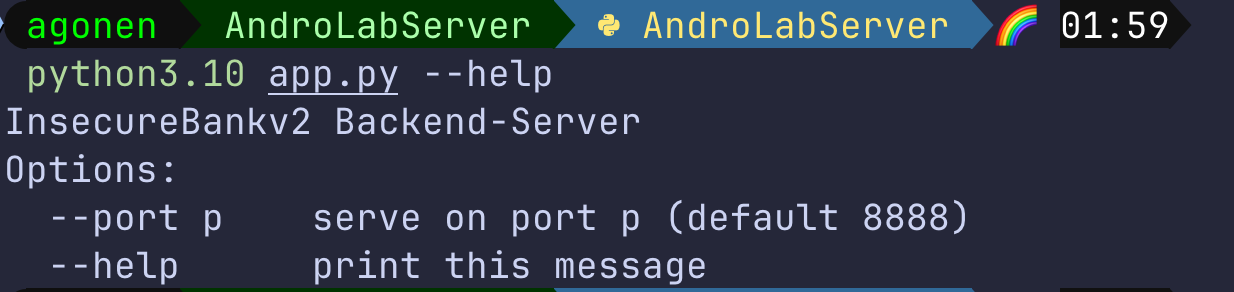
Spawn the server:

Yes, this is 2AM.
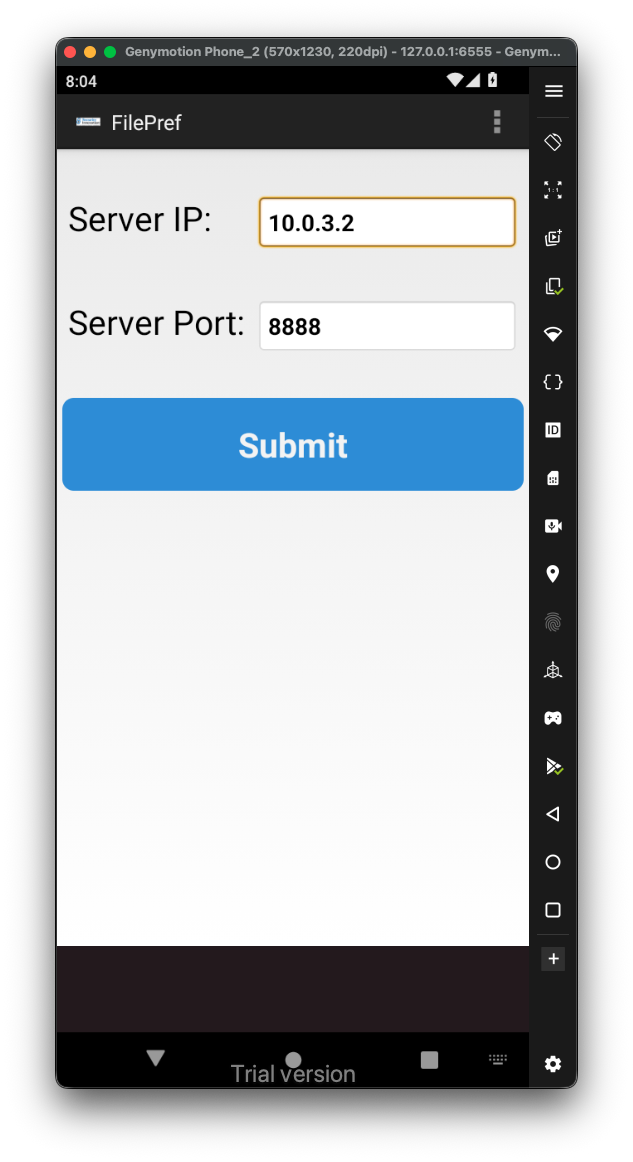
On the preferences of the app you’ll need to setup the address of the server, remember that the host ip address in genymotion is 10.0.3.2. If it isn’t working, try the address 127.0.0.1.
 I’ve set up the proxy on the emulator, using the tool I’ve created that can be found here https://github.com/avishaigonen123/CTF_writeups/blob/master/stuff/emulator_tool.sh:
emulator_tool --setup-proxy --proxy-port 3333 --burp-port 8082

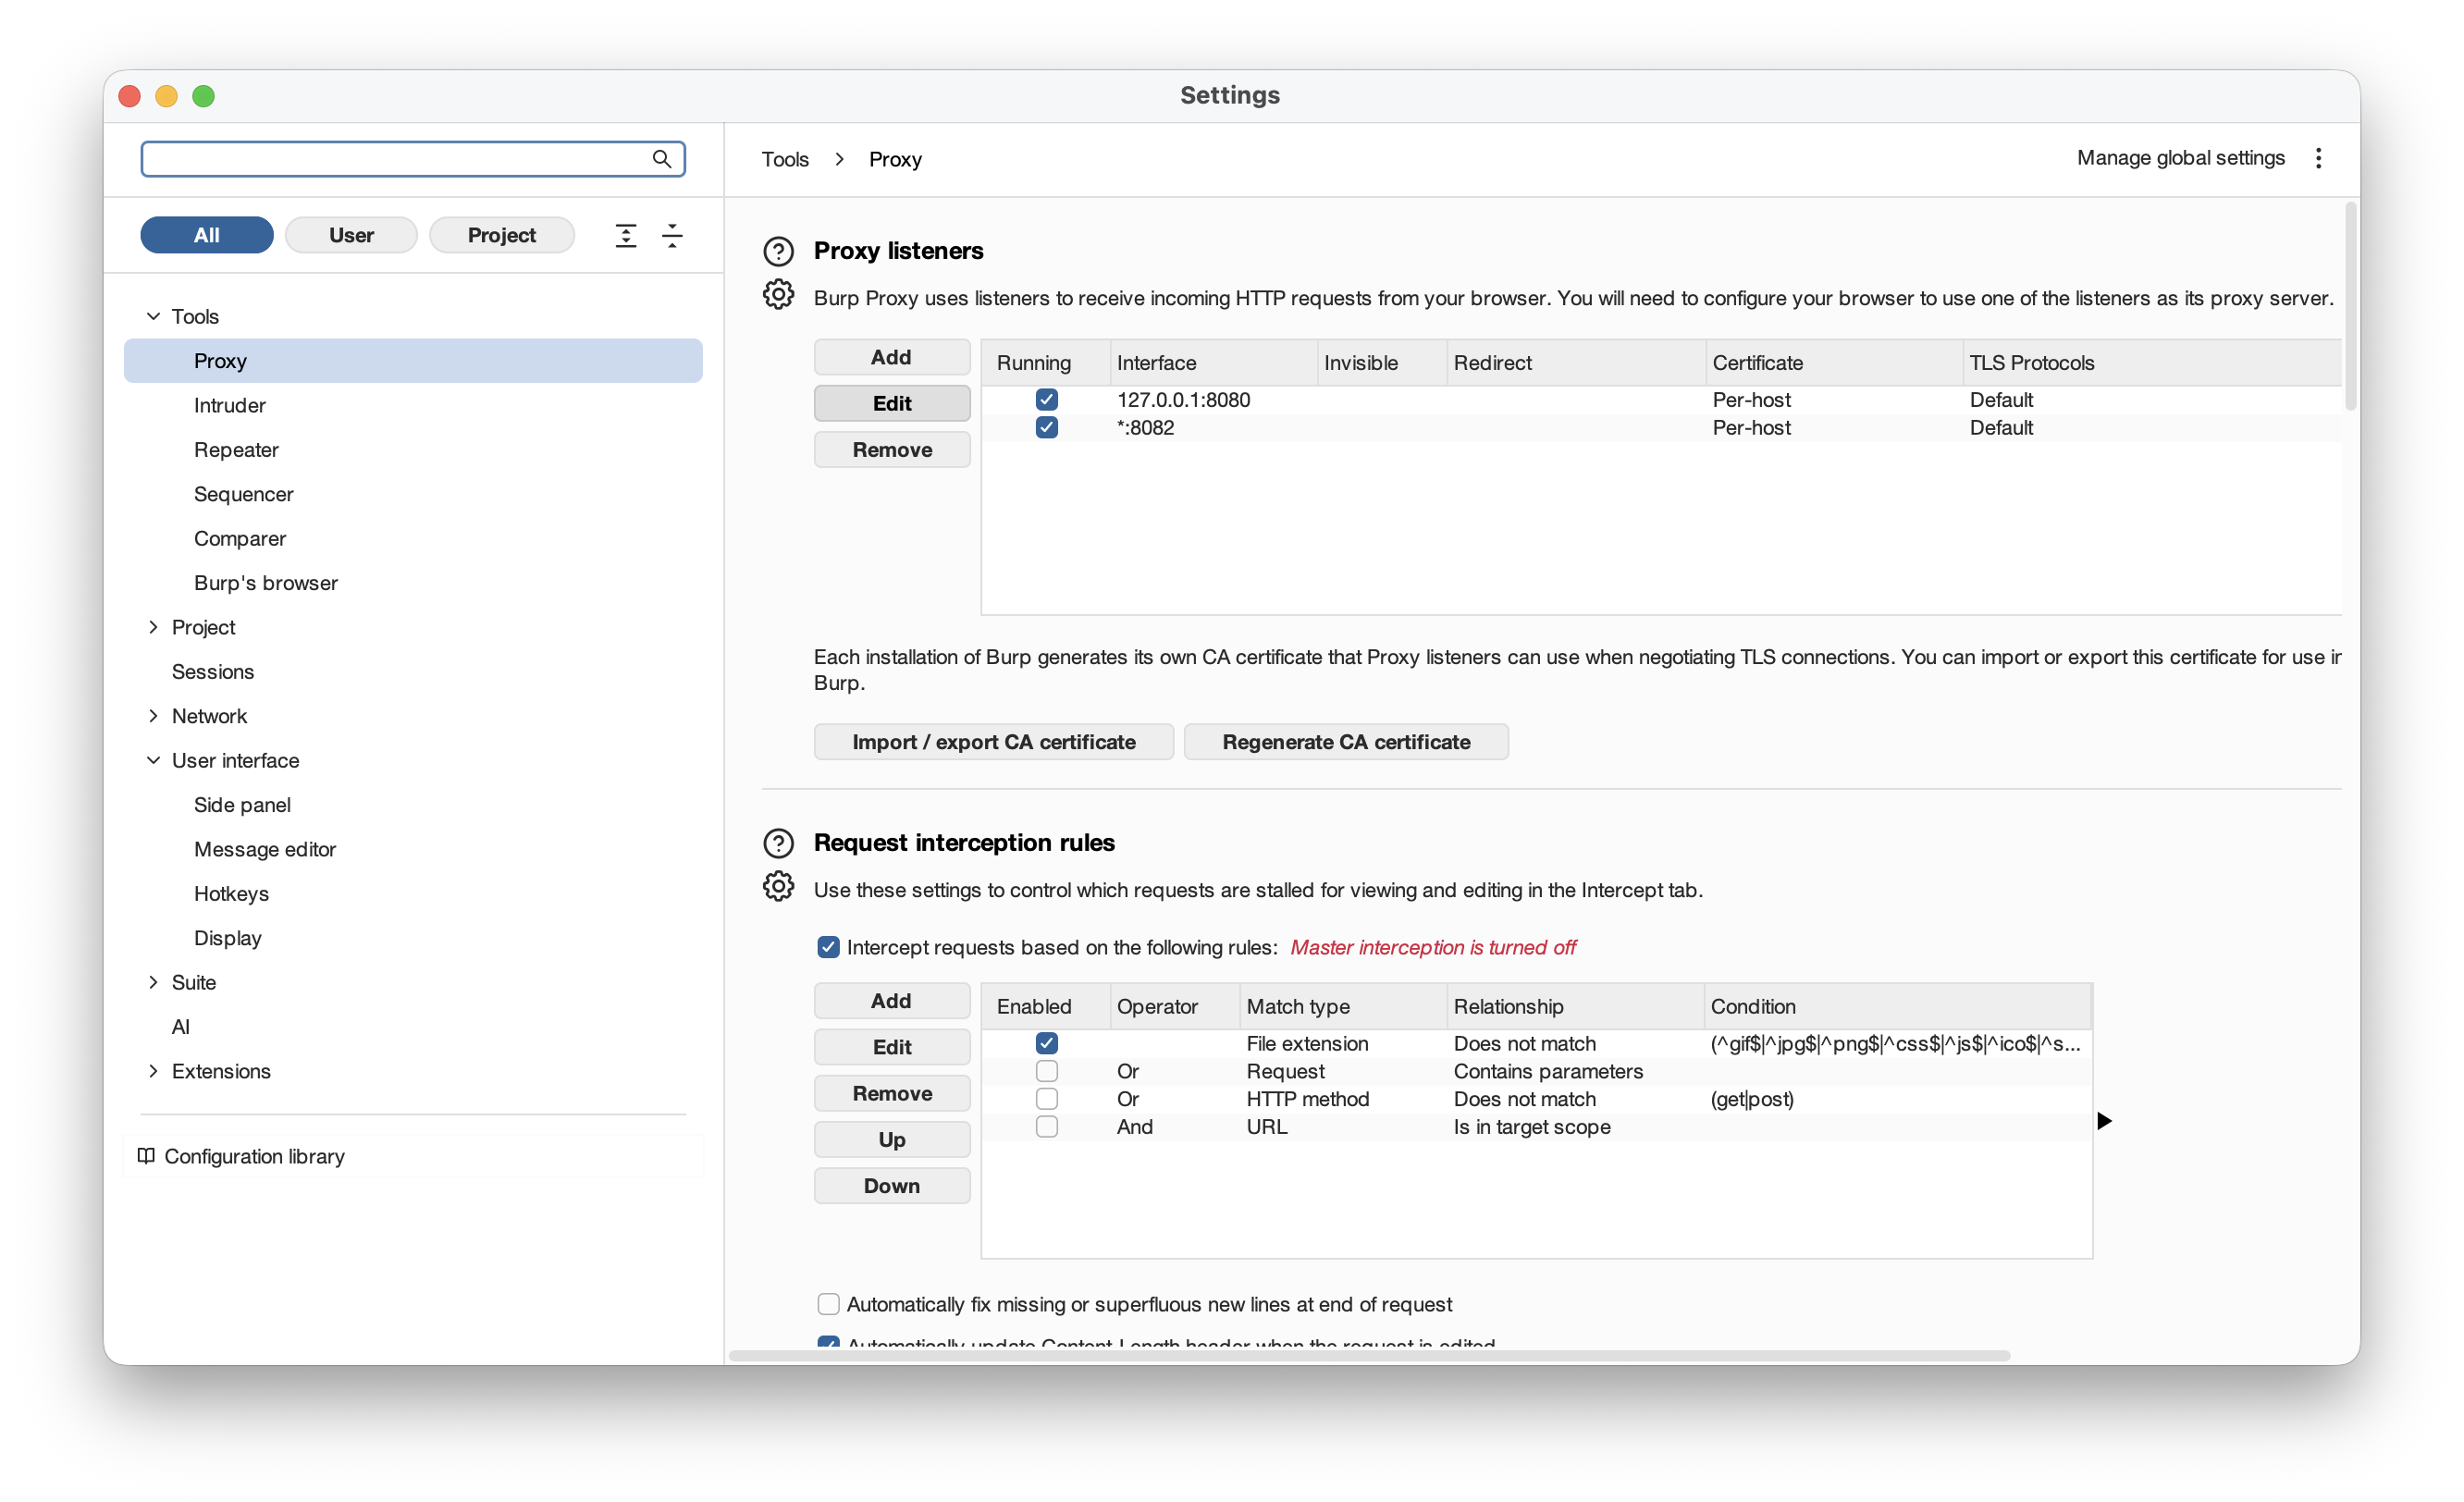
and also setup the listener on the burp suite itself:
 Now, we are ready to try and login to the application, and then inspect the request:

Now. we are ready to start working and exploring the application